Showing posts with label (09) ingredients. Show all posts

Honey Yogurt Whole Wheat Bread

IMG_3576

For my birthday this year, a dear friend gave me a beautiful bottle of olive oil, made from his family's farm in Greece.  The olive oil is... fantastic.  Beyond fantastic.  It tastes so flavorful and fresh, you can have it on its own.  I mean, I wouldn't advise you to drink it straight from the bottle, but if some dribbles off the side of the bottle and you happen to see it and you want to catch it with your finger and then you want to suck that olive oil off your finger, then, well... who am I to judge?

IMG_3585
What’s left of the olive oil.  That is some good ish right there.

Oftentimes when I feel unmotivated to do something, I give myself a proverbial carrot to help me along.  This morning, in order to inspire me to clean the kitchen and then work out, I promised myself hot coffee and fresh, homemade bread.  Here’s my recipe for quick, whole wheat bread.  From start to finish, it takes less than an hour.  In the batter, I use whole milk plain yogurt, whole milk, and raw local honey.  I also used a scoop of the delicious olive oil, shown above.  It turned out wonderfully.  The density is similar to other quick bake breads (like banana bread), but it’s got a bit more of a crumb.  Can’t wait to have some for dessert tonight!  One of my favorite things to do is to toast it in a pan with butter – you can get a nice, crunchy, buttery crust on the bread.  If you’re feeling extra extravagant, garnish with ice cream.  Hot damn that is some good eatin’ right there. 
IMG_3574

Recipe

Adapted from Shelbee's recipe.


Makes one (1) loaf.


2 c. whole wheat flour
1 c. all-purpose flour
2 tsp. baking powder

1 tsp. baking soda 
1 tsp. salt
1 cup of honey
1 cup of yogurt
1/2 c. whole millk
1/2 c. olive oil

Pre-heat the oven to 350°.


1.  In one bowl, mix the flours, baking powder, baking soda and salt. 
2.  In a separate bowl, whisk together the honey, yogurt, milk, and olive oil.
3.  Make a well in the bowl of the dry ingredients and pour in the liquid ingredients.  Mix until just combined. 
4.  Grease a loaf pan on all sides and pour the batter in.  Bake for 40 minutes. 

Once the bread is done, flip the pan over to knock the bread out.  Put the bread right side up and, if you’re impatient and hungry like me, feel free to liberate a slice of fresh bread from that pan, and pop it in your mouth.  Perfect with jam and butter, and a cup of coffee or tea.  I didn’t even make it to the dining table – just ate it, standing in the middle of my kitchen.  Mmmm…..  Happy Sunday. 

Lunar New Year & Chinese Almond Cookies

IMG_2821

The lunar new year is possibly the biggest Chinese holiday of the year.  It is a huge family holiday, and families travel far and wide to be together during this happy, auspicious time.  My mom told me that, traditionally, the new year was observed for two weeks and people went home to be with their families.  Nowadays, overseas Chinese typically take anywhere from 2-7 days to celebrate the new year.

While there is a lot of overlap in how the new year is observed, each province and village celebrates the holiday in its own way.  Because my father’s family is from Guang Dong (southern China), and my mother’s family is from Taiwan by the way of An Hui (northern China), I was raised with a mix of traditions.

My mom told my sisters and me that everything you do for the first week of the new year sets the tone for the rest of the year. The Chinese culture is chock full of superstitions, and most traditions have a reason, story, or symbolism behind them. Avoid fighting and stress, which includes no working and no major cleaning – everyone eats, relaxes, socializes, and plays games. You aren't supposed to use a broom, because you might sweep out the good luck. You aren't supposed to use a knife or scissors, because you might cut your good luck. Before the first day of the new year, everything in the house is cleaned top to bottom to chase out any ill-fortune that might be lying around and give the new year a clean start. We all wear something new that is red, because red symbolizes good luck.

In many homes, the word fortune is hung upside-down, outside on the front door.  This is to symbolize good fortune pouring down on you.

papercuts-fu
This is fortune, right side up.

While most people take the word down after awhile (just like any holiday decoration), I keep 福 () on my door all year-round.  I don’t think you can ever have enough good fortune!

We also give hong bao, which are little red envelopes decorated in gold and filled with money.  Traditionally, adults give hong bao to children.  Interestingly enough, you are a “child” until you are married.  Once you are married your parents no longer have to give you hong bao and the giving is reversed (you give hong bao to your parents and grandparents, and to children).  In my family, on new year’s day morning, my sisters and I used to go to my parents’ bedroom and bow three times to them, wishing them good health, prosperity, and a happy new year.  Then, they would bless us with good wishes and give each of us a hong bao.  To properly receive hong bao, you accept it with both hands as you bow to the giver in thanks.  After receiving our hong bao, we'd bow and say, "gong xi, gong xi" which means congratulations.  My grandparents also gave us hong bao, and all the grandchildren would line up in front of them to bow, and give and receive blessings.  

hongbao
Hong bao. There are tons of variations though; you can even find hong bao with Mickey Mouse on them! 

The Chinese culture is very superstitious about numbers.  For this type of thing, I’d look to a place like Wikipedia for all the number combinations that are good or bad.  There are so many, it takes real effort to memorize them all.  The worst number is 4, which is a homonym of death.  You want to avoid giving money beginning or ending in 4.  Generally, the other odd numbers are good, while 2, 8, and 9 are particularly auspicious: 2 because good luck comes in pairs, or the desire to double your fortune; 8 because it is a homonym for prosperity; 9 because it is a homonym for long, thereby symbolizing longevity and a long life.  Some provinces celebrate the birthdays ending in 9 the way Americans emphasize the celebration of decade birthdays.  Some provinces believe celebrating on the decade birthday ending in zero is not fortunate, because zero symbolizes emptiness.  When giving money, it's okay to give whole numbers ending in zero because it's the first number that counts.  Don't ask me why.  My mom’s favorite number is 168, which is one of the luckiest number combinations: 168 (yi liu ba) sounds like 一路发(yi lu fa), which roughly means long-lasting prosperity, or prosperity all the way.  The cash given in hong bao is traditionally nice, new and crisp, fresh from the bank.  Fresh money, fresh fortune.

Good gifts to give during the new year?  Food!  Oranges and other citrus fruits symbolize good luck, wealth, and a sweet life.  They are similar to the color gold, which is a good luck color.  You also can’t go wrong with chocolates and candy, to wish someone sweetness in his or her life. Plants are also good gifts, but make sure you do your homework and get the right type!  This year a good friend gave me a jade plant, which I’m thrilled about.  Jade symbolizes friendship, wealth/prosperity, and good fortune.

This year, I made my first lunar new year dinner by myself.  It was exciting on one hand, but it also filled me with longing for my mom and sisters.  When we all lived in the same city, we gathered together to make food, talk, and laugh together.  My mom’s egg rolls are to die for, and she made everything taste delicious.  Every dish symbolizes some kind of good fortune or blessing for the new year.  The six basic types I’m familiar with are good fortune, wealth and prosperity, good health, longevity, happiness, and abundance.  For more, you can check out this site for a brief, though not complete list.  I’m only one person, and a novice new year’s cook, so I went with a soup, three entrees, one side dish, and a dessert.  In this post, I share how to make the dessert: almond cookies! 

Also, I got a really lucky surprise new year's eve: I got to see both my sisters!!  Their flight was delayed and they ended up with an overnight layover in Chicago!  I was so, so happy.  We hung out for eight hours eating cookies, laughing, and talking the night away.  It was the best.

The Year of the Dragon New Year Menu! 

Chicken Soup
chicken, ginger, shitake mushrooms
Roast Chicken
brined whole chicken, bacon fat, olive oil, cracked salt and pepper
Roasted Brussel Sprouts
bacon fat, chicken fat, cracked salt and pepper
Steamed Salmon
soy sauce, sherry, ginger, garlic, scallions
Shrimp Fried Rice
rice, green peas, eggs, shrimp, scallions, garlic
Almond Cookies
recipe below!

Almond Cookies1
IMG_2824

Besides being delicious, almond cookies symbolize wealth and prosperity.  So eat up, eat up!!

Recipe 
This recipes makes about 36-46 cookies. 

1 c. whole wheat flour
2 3/4 c. all-purpose flour
1 tsp. baking soda
1/2 tsp. salt
1 c. butter, room temperature
1 c. sugar
3 tsp. almond extract
1 egg
Whole almonds (36-46)
1 egg (for the wash)  

Pre-heat the oven to 350°.

1.  Mix together the flours, baking soda and salt.
2.  Cream together the butter, sugar, almond extract, and one egg. 
3.  Combine the flour and butter mixture together until it looks all pebbly. 
4.  Form 1 tablespoon balls of dough.  Gently flatten the top with your fingers and press a whole almond into the center.  Alternatively, place an almond inside the tablespoon and pack it with dough.  Then, flip it over so that the cookie looks like a little dome.
5.  Beat the second egg and brush it over the top of the cookies.  Bake for 15 minutes.


新年快樂!  恭禧發財!
Xin Nian Kuai Le! Gong Xi Fa Cai!

Chocolate Peanut Butter Cookies with Almonds

IMG_2702

I was really bored the other day and had a sudden hankering for chocolate chip cookies.  This is big news in my world.  I haven’t liked chocolate chip cookies in ten years.  I can hear your likely reaction now (how can that BE???), but it is what it is.  Most chocolate chip cookies are just gooey, sugary dough with pockets of hardened chocolate inside.  While that may sound great to some, I think it’s a sad excuse for a cookie.  The texture is all off (hard chips in goo? no thank you), and there is so much sugar that the chocolate doesn’t shine through at all. 

I went to the fridge to see what I had on hand and found a bag of chocolate and peanut butter chip morsels.  Score.  Chocolate + peanut butter = my favorite!  I'm also loving whole wheat flour and have been using it in every recipe calling for all-purpose flour.  I substitute it in a 1:1 ratio and do not increase or decrease anything else to "accommodate" the whole wheat flour.  Some sources say to increase the liquids, or only substitute up to 50% of the flour, but I haven't listened.  I've been happy with every product made this way and love the wheat flavor that comes through.  

The following recipe is adapted from the Nestle’s bag, and I’m thrilled with the results.  THRILLED.  These might very well be my new favorite cookie.  This recipe makes 50 cookies.  Have a tall glass of cold milk on hand! I enjoyed these cookies while nestled in with a good book and a cup of hot coffee

Recipe  
2 1/4 cup of whole wheat flour
1 teaspoon baking soda
1 teaspoon salt
1 stick of butter (1/2 cup)
1/2 cup brown sugar
1 teaspoon vanilla extract
2 large eggs
1 1/2 cups of combined chocolate chips and peanut butter chips
1 cup of chopped nuts


Preheat oven to 375°.

(1)  Combine flour, baking soda, and salt.
(2)  Beat together butter (room temperature is best), brown sugar, and vanilla extract.  Add eggs, one at a time, beating well until creamy.  Gradually beat in the flour mixture.  Stir in morsels and nuts.
(3)  To make each cookie, roll 1 tablespoon of batter onto a ball and place each the ball an ungreased cookie sheet.  Flatten each cookie before putting them into the oven (I like to use the bottom of a glass).  They will barely spread, so don’t worry about crowding.  Bake for 9-11 minutes and then allow to cool.  Or enjoy a treat and sneak one in while they’re warm – they’re oh so good that way!


*Tip from my sister: if you want a less crisp/crumbly cookie, you can try experimenting with the batter and adding one to two egg yolks.

Peanut Butter Banana Oatmeal Nest Cookies with Chocolate Eggs


This is a late night munchy inspired by my special Maine family; the recipe is modified from Fondly Optimistic.  K got the ball rolling because he's always hungry; S's genius was adding chocolate eggs; J's formation of the dough made us think of nests!

This is the first version of this cookie - it was kind of a haphazard throwing together of this and that, I didn't really follow the directions and was actually certain that the cookies I made would taste really gross.  I was seriously about to throw all the batter away until my Maine Mom said I should just make them anyway.  Next time, I might adjust the next batch to 1/2 teaspoon salt and 1/2 teaspoon baking powder and see how that works.  

The cookies don't have any sugar in them, but you can add them if you'd prefer a cookie with some sweet.  As is, these taste pretty wholesome/granola-y and are yummy with a cup of coffee or cocoa.


Recipe
4 Tbsp butter (real butter)
2 cups oats
2 bananas (mashed)
1 cup peanut butter (creamy or crunchy)
1 tsp vanilla extract
1 tsp salt
2 tsp baking soda
1.5 cups of whole wheat flour
Chocolate of your choice, about half a chocolate bar (chopped small or use your fingers to break into little pieces)

Turn the oven on to 350°.

1) Melt butter in a pan on medium heat and add oats.  Stir to coat the oats and let "toast" for five minutes, stirring occasionally.  Turn off the heat and let the oats hang out.
2) In a bowl, beat together the mashed bananas, peanut butter, vanilla extract, salt, and baking soda.
3) Add the oats to the banana batter and mix thoroughly.  Then add the flour and mix thoroughly. 
4) Use a big spoon to roll small balls of batter (about 2 Tbsp each) and place them onto a cookie sheet.  They don't need to be spaced far apart because they will barely spread.  Flatten the center of each ball with your thumb to form a "nest."  Place chocolate pieces into each nest.
5) Bake for 15 minutes and let cool.

Pancakes - Classic, Banana, and Orange Juice

I love pancakes.  They're so easy to make.  Whenever I see boxed pancake mixes, I shake my head with dismay.  Make your pancakes from scratch, I beseech you!  Home cookin' is always better.  

This isn't the simplest pancake recipe in my repertoire, but it's my favorite.  Thumbs up to           America's Test Kitchen.  I simply added bananas to their already perfected recipe.


Ingredients
1 tablespoon juice from 1 lemon
2 cups milk
1 large egg
3 tablespoons melted butter + 2 tablespoons butter
2 cups unbleached all-purpose flour
2 tablespoons sugar
2 teaspoons baking powder
1/2 teaspoon baking soda
1/2 teaspoon salt
4 ripe bananas (optional to add bananas; ratio = 2 bananas: 1 cup flour)

Directions
1. Mix lemon juice and milk together. Set aside.
2. Whisk flour, sugar, baking powder, baking soda and salt together. Set aside.
3. Whisk egg and melted butter into the milk until combined. Set aside.
4. Mash bananas with a fork, then slowly stir in the egg mixture.
5. Make a well in the middle of the dry ingredients in the bowl and pour the milk mixture into it. Whisk gently until ingredients are just combined. You want the batter to be lumpy. Do not overmix or the pancakes will come out rubbery.
6. Heat a pan over medium heat for about 3 minutes. Add a small pat of butter and pour 1/4 cup of batter onto the pan. When large bubbles appear and pop on the top of the pancake, flip. Cook each side for 1-2 minutes.
6. Serve immediately or keep the pancakes warm on a cookie tray in the oven at 200 degrees.

- For Classic Pancakes, leave out the bananas.
- For Banana Pancakes, follow the instructions above.
- For Orange Juice Pancakes (they really are delicious and you should try them), replace the milk with equal parts orange juice and leave out the lemon juice. These, by far, get the best reviews from my friends. :)

 { mash those bananers! }

 { bananas after mashing }

 { little lone pancake }


{ time to eat! }


Rainy Day Birthday Cake

This is a cake with basic ingredients that anyone can throw together at the last minute. The bonus is that in addition to the few number of ingredients, it's very fast and easy to make.

Today, K and I celebrated our 2nd anniversary (or birthday, as I like to call them) one day early. We were discussing what to have for dinner - one of my favorite conversation topics - and getting excited about all the possibilities when, at the end of the discussion, I blurted out, "And chocolate cake for dessert!" His eyes gleamed and he exclaimed, "Hell yeah!" This was all well and good until I remembered that I'd decided that I wasn't going to leave the apartment for the rest of the day. Hmm. Problem. What if I didn't have all the necessary ingredients?

I pored through my cookbooks and did some research online. I'm not a pro baker, but I figured I could gather the basics of a cake, and whip something together. It didn't have to be a show stopper, just a good, basic, yummy cake. Essentially, a lazy cake, or as I've named it, a Rainy Day Birthday Cake. (Yes, it was raining outside.) I had to forgo the chocolate since I didn't have any on hand, but that's okay. K loved it.  I did, too.  Happy birthday, honey.

Ingredients
4 tablespoons of real butter, softened
1/3 cup of white granulated sugar
1/3 cup of packed, dark brown sugar
1 1/2 cups of all-purpose flour
2 teaspoons baking powder
1/4 teaspoon of salt
1 whole egg
1 teaspoon of vanilla extract
3/4 cup of whole milk

Directions
1. Turn oven on to 300 degrees.
2. Whip the butter until smooth and creamy. (Mind you, I am stubborn and still do all my mixing, whipping, creaming, etc. manually, but you are welcome to embrace technology and use an electric mixer. You're also supposed to leave the butter out and let it get to room temperature, but I'm an impatient, last-minute cook. I microwave the butter for 30 seconds to get the right consistency. You want to be able to press your finger into the butter and be able to make a small indent. You do NOT want liquid butter. That will totally change the consistency of your cake.)
3. Add the sugar to the butter and whip until it's light. Once the mixture is light, beat in the egg, and then the vanilla extract.
4. In a separate bowl, sift together the flour, baking powder, and salt. Add these dry ingredients to the wet mixture bit by bit, alternating with the milk. Keep stirring until the batter is smooth.
5. Pour the cake batter into a 9" round metal pan and bake for 25-30 minutes. When you stick a fork in it, a couple crumbs should hold onto the fork. If the fork is totally clean, the cake may be overdone and dry.
{ baked to a golden brown perfection :) }

Banana Cake

This is a very easy cake recipe requiring little finesse, time and attention. I loves it.

Ingredients
3 cups of all-purpose flour
1 1/2 cup of white granulated sugar
1 tsp. baking soda
1 tsp. salt
1 tsp. ground cinnamon
1 cup vegetable oil
3 large eggs (preferably room temperature)
1 1/2 tsp. vanilla extract
4 medium bananas - ripe (with brown spots), frozen, thawed, and coarsely mashed

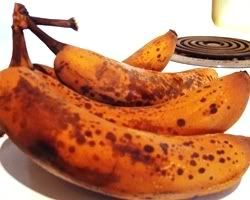
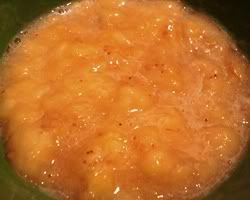
A note on bananas... I always freeze the bananas when they're ripe (they'll have brown spots) and thaw them the day that I'm ready to bake. When I set the bananas out, I also set out the eggs. The bananas won't be pretty and will turn black due to oxidization, but don't worry - that's normal.

Bananas - Before and After


Photobucket Photobucket


A note on flour... for a long time, I wasn't sure as to how to measure flour - do I pack it to get as much as possible? The answer is no. I learned from King Arthur Flour Company that you shouldn't pack flour when measuring. A good way to ensure that you get the proper amount is to scoop flour into your cup and shake so that the flour stays fluffy and loose. Scrape off the top with a flat edge so that it's flat.

Now, for the baking!

Directions
1. Pre-heat oven to 350 degrees F.
2. Butter a 9x13 glass pan and lightly coat with flour (this ensures that the bottom of the cake doesn't stick to the pan).
3. Whisk together flour, sugar, baking soda, salt and cinnamon.
4. Whisk together vegetable oil, eggs and vanilla extract - add and whisk into flour mixture.
5. Mash and then thoroughly stir in bananas.
6. Pour batter into the 9x13 glass pan and put it into the oven.
7. Bake for approximately 30 minutes. Check doneness by sticking a toothpick or knife into the cake. If it comes out with any wet batter on it, put it back into the oven for a few minutes.

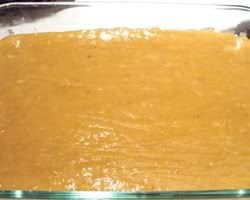
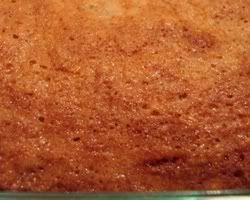
Cake - Before (as batter) and After (as delicious treat to put in your tummy!)


Photobucket Photobucket


Allow the cake to cool. You always see recipes saying this and it's for good reason. The goods need to set. But I have to be honest with you. I often can't wait and this time was no exception. I cut into the cake while it was still warm and I was happily rewarded. Heaven! I love fresh out of the oven baked goods. Very little can beat that. :)